In the past, contractors sized heating and cooling systems using simple rule-of-thumb guesstimates, such as a ton of cooling capacity per 500 square feet of floor area. While these calculations may have been close enough for drafty old homes, they’re way too inaccurate for today’s energy-efficient building methods. Use them and you’ll likely end up with an oversize unit that constantly switches on and off and never runs long enough to bring humidity down to a comfortable level. That constant cycling also means equipment will wear out more quickly than it should. Needless to say, your customers won’t be pleased.
HVAC Sizing Beyond Rules of Thumb
The good news is that a growing number of HVAC contractors have moved beyond rules of thumb and are now doing load calculations using the steps outlined in the Air Conditioning Contractors of America (ACCA) Manual J, 8th edition. But just because the calculated load is 4 tons doesn’t necessarily mean you want a 4-ton air conditioner. That’s because the load calculation is just the first step in an accurate design: You also need the right equipment, along with well-designed and installed ductwork and registers. These are covered in three other ACCA publications: Manuals S, D, and T (find out more about the ACCA manuals here).
Some builders don’t realize that the steps outlined in three of these manuals are required by the International Residential Code, with Manual J added to the code in 2003, Manual S in 2009, and Manual D in 2013. Although these requirements are often ignored, if you make sure your HVAC contractor follows them, you will save money on equipment while making your homes more comfortable. Builders that understand the basics of these protocols will be able to work with their HVAC contractor to specify the best system for the house.

FIGURE 1: This table is an example of a manufacturer's extended performance data. The designer can use this data to size the HVAC system to meet the home's actual loads and design temperatures.
HVAC Load Calculations Pay Off
The perfect HVAC system starts with an accurate load calculation. The Manual J protocol ensures this by factoring in all relevant variables, including exterior wall and roof surfaces, window U-values, insulation levels, and orientation.
Doing a Manual J calculation from a set of plans takes more time than using rules of thumb, but it pays off in lower system costs and fewer comfort-related callbacks. The calculations are simpler than they used to be, thanks to ACCA-approved software that’s more easy to use than ever and that can be accessed via a desktop computer, a tablet, or a smartphone (go to acca.org/standards/approved-software). The programs will calculate the total heating and cooling load, including sensible heat (temperature) and latent heat (humidity) loads, as well as how much air in cubic feet per minute (CFM) needs to be delivered to the house as a whole as well as to each room.
An important warning: Some contractors are reluctant to rely on the software’s estimate and they try to create “safety factors.” They manipulate the outdoor design temperature, don’t take full credit for efficient construction, or ignore internal and external window shading devices. These measures aren’t just unnecessary—they’re counterproductive. Safety factors have already been considered as part of the protocol, and any attempt to add more of them can generate significant sizing errors. Instead, the system designer should use the most accurate numbers available on envelope construction and duct-system efficiency. Trust the software: When it comes to calculating loads, it’s smarter than you are.
How to Choose HVAC Equipment
With the whole-house loads and per-room air requirements in hand, it’s time to select the HVAC equipment. Unfortunately, even those contractors who take the time to perform careful Manual J calculations often go wrong here.
The typical mistake is basing the selection on a certificate issued by the Air Conditioning, Heating, and Refrigeration Institute (AHRI). The problem is that the AHRI certificate measures the equipment’s nominal rather than its actual capacity—that 36,000 Btu/hr air conditioner may only put out 34,000 Btu/hr—and assumes indoor and outdoor temperatures of 80° F and 67° F, which are unlikely to match the actual design conditions. The result? Mechanicals end up either oversized or undersized.

FIGURE 2: Examples of throw and spread from different air registers.

The illustration shows how stretching flex duct tight lowers the friction that airflow encounters.
Rather than AHRI certificates, rely on ACCA Manual S–Residential Equipment Selection, which tells you to use the manufacturer’s extended performance data. These numbers let you specify a piece of equipment that’s precisely sized for the home’s calculated load and the indoor and outdoor conditions (Figure 1, above).
The HVAC Design Process and Correct HVAC Sizing
To get a properly sized HVAC system with the correct airflow to each room, the designer has to work through the protocols outlined in ACCA Manuals J, S, D, and T. Software will do most of the work, but the designer must input accurate data.
1. Construction details—including orientation, roofing and siding, insulation, fenestration, shading, indoor and outdoor design temperatures—are entered into the software, which then calculates the house and room loads.
2. The calculated loads and system type (central, forced-air heating, or air conditioner, for example) determine the equipment size and blower performance needed for the house.
3. Data, such as the blower performance, type of duct system, and room loads, are then used to size and configure the ducts and registers.
4. With the duct design complete, the designer needs to revisit the blower selection to make sure it’s sized for the calculated static pressure. If not, a different size blower may need to be specified.

Why HVAC Registers Should Come First
A properly designed air distribution system will have efficient ductwork with minimal friction losses, well-sealed joints, adequate return paths, and the right air outlets, or registers, for each room.
Though it’s not unusual for a contractor to design the ducts, then choose the registers as an afterthought, that’s backward. Registers should be specified first, according to ACCA Manual T–Air Distribution Basics. Following this protocol will ensure that each register delivers the CFM of air needed and that it has enough throw to ensure adequate air mixing without excessive noise or the feeling of a draft (Figure 2, above). It’s unlikely that registers sized by rule of thumb will meet these goals.
If you do this correctly, then register size will vary by room size and the volume of air delivered. In fact, if every register in the house is the same size, then distribution of air throughout the home’s various rooms will be incorrect, even if the total volume of air delivered to the home is on target. Yes, right-sizing the registers may generate pushback from the HVAC trades, as it could force them to stock more register sizes. But there’s no alternative if you want the home to be comfortable throughout.
RELATED
HVAC Ducts Done Right
With the registers selected, the next step is to design the duct system using ACCA Manual D–Residential Duct Systems. Some ACCA-approved software programs include Manual D duct design modules that automatically size the ducts, ensuring adequate airflow to each room.
To get the most efficient system with the smallest practical duct sizes, you must minimize static pressure in the ductwork. Keep the following best practices in mind:
• Centrally locate the air handler. Excessively long duct runs need to be oversized to compensate for friction losses. Strive to make them shorter.
• Minimize elbows. Every elbow creates friction losses.
• Right-size the ducts. Ducts should be sized for the volume and velocity of air they need to carry.
• Keep ductwork in the conditioned space. This may mean adding some chases, but we regularly design kitchens with space for a stove and refrigerator. Why don’t we allow space for the distribution system?
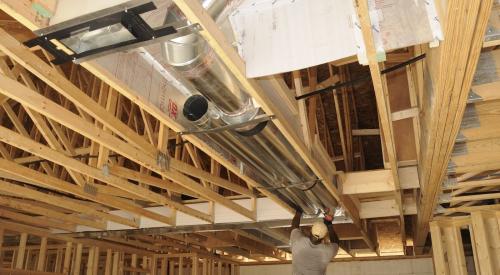
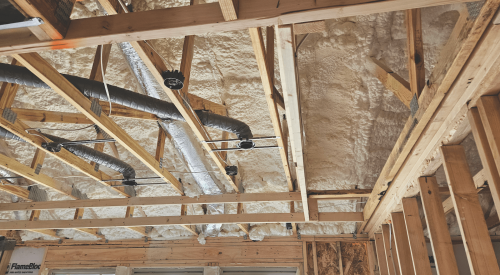
• Carefully install flex duct. If you’re installing flex duct, reduce friction losses by pulling the ducts tight (Figure 3, above) and by using enough stirrups or straps to prevent sagging.
• Seal and test. Joints, seams, and connections should be sealed to prevent air leaks. A lot of codes require a duct blaster test in any home where the ducts pass through an unconditioned space, but I recommend performing this test on every home to ensure that the ducts have been properly detailed.
• Don’t forget returns. Every room with a supply outlet (except for bathrooms or kitchens) must have a clear return air path back to the air handler. Rooms without adequate return air can impede supply airflow by over-pressurizing the room, leading to comfort issues.


A straight duct return can broadcast blower noise to the living space. A duct with a couple of turns will be much quieter.
Returns warrant some extra attention because it’s easy to undersize them. The central return will be the largest duct in the house, and two-story homes will need a separate central return on each floor to prevent temperature stratification—too-hot second floors in summer and too-cold first floors in winter. Return ducts should include enough bends to muffle noise from the HVAC blower (Figure 4, above).
The central return on each floor also needs to be fed by adequately sized return paths from the individual rooms, with each room needing a return air path with 1 ½ times the cross-sectional area of that room’s supply register. The common practice of relying on door undercuts won’t satisfy this requirement, but bigger openings create privacy issues. Ways to muffle noise include an over-door transfer grille, a vertical duct run in a stud bay with high and low outlets on opposite sides of the wall, or a jump duct in the ceiling (Figure 5, below).
Note that while the distribution system is the third step in the process, consider it early when designing the home.
Reviewing the framing plans with the HVAC contractor will help identify ways to reduce system costs with shorter duct runs and smaller cross-sectional areas while ensuring that ducts are kept in the conditioned space.
Also, revisit equipment selection after completing the preliminary duct system design. Many times, the system’s pressure restrictions will lead you to choose different HVAC equipment in order to meet the home’s room-by-room airflow requirements.

Return paths from bedrooms to hallways need to be larger than most builders realize, which of course introduces privacy issues. Techniques for addressing this include an over-the-door transfer grille with a sound-muffling baffle, an in-wall duct with high and low outlets, and an insulated flex duct run through the attic or joist bay.
Final Steps for HVAC Installation
During installation, the HVAC contractor should calibrate the blower speed to meet the ductwork’s airflow needs. Unfortunately, it doesn’t always happen. One contractor told me he didn’t have time to adjust blower speeds. But the adjustment doesn’t take much time, and it could be as simple as moving a switch or wire connection. The builder needs to make sure this task is completed.
The bottom line is that a well-designed HVAC system that performs optimally requires collaboration between the builder and the HVAC contractor. The payoff from using all four ACCA manuals to properly design your HVAC system will be lower equipment costs, lower operating costs, longer system life, and more comfortable homeowners.
Arlan Burdick is a building performance specialist with IBACOS.
