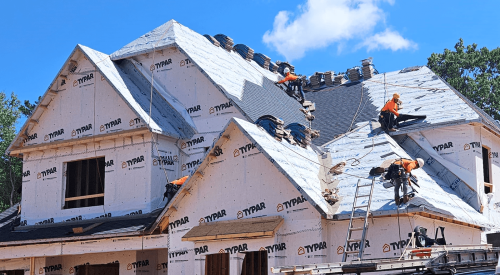
| Surprisingly, one of the most common mistakes builders make on roofing projects is failing to follow installation instructions. Quizzing the crew on proper installation protocols and keeping current installation instructions on file with the jobsite superintendent are two ways builders can help avoid mistakes in the field. |
Through work with builders of all sizes in the National Housing Quality (NHQ) Certification Program, the NAHB Research Center has discovered several common mistakes and process omissions made on the jobsite that can jeopardize the quality and durability of typical, asphalt-shingle roof installations. Here are five areas builders should focus on to avoid those mistakes:
1. Follow all manufacturers’ installation instructions. Installation protocols and code requirements can vary significantly from one type, style or brand of shingle to another. For example, starter-course instructions, nailing-pattern requirements and roof-coverage area often vary from product to product. Unfortunately, instructions often get overlooked or discarded altogether during the construction process. Failing to follow instructions can lead to durability problems and can possibly void the manufacturer’s warranty, leaving the builder bearing the full cost of any needed repair or replacement. Here are three simple ways builders can reinforce the importance of following installation instructions:
- Take the time to read the instructions and quiz your crew on proper installation protocols. Regardless of how many times they’ve installed those materials, they may have been doing something wrong all along and just didn’t know it.
- Make sure all current installation instructions are on file with the jobsite superintendent and affixed to the scope of work given to the roofing-trade crew leader.
- Regularly take stock of installation instructions on file on the jobsite to be sure they are the most current for the type and style of material you’re using.
2. Create a comprehensive job plan. A builder’s goal with any element of a job should always be to do it right the first time to avoid costly delays. The key to getting it right is creating a comprehensive job plan for every type of work on the site. Roofing is no exception. Here are three tips for creating an effective roofing job plan:
- Carefully lay out the job before it begins. Place evenly spaced chalk lines along the roofing underlayment to give the installer a visible guide for every course.
- Before the roofing work begins, decide on valley style and ridge and gable end treatment, and be explicit about those details on the plans and scope of work.
- Periodically confirm the takeoff and make sure there is a sufficient quantity of shingles from the same dye lot on the jobsite. Running a few square feet short at the end of the job and filling in with shingles that don’t quite match is a rookie mistake that reflects poorly on your reputation for quality.
3. Get the fastening details right. Builders often specify the type and style of shingle for the roof, but they rarely choose the type and gauge of fasteners for those shingles. Using the wrong fasteners can lead to wind damage and result in a red tag by the code inspector.
|
Builders often specify the type and style of shingle for the roof, but they rarely choose the type and gauge of fasteners for those shingles. Using the wrong fasteners can lead to wind damage and result in a red tag by the code inspector. |
The type of fastener required for the job is called out in the manufacturer’s installation instructions, as well as in the local building code. If you have a personal preference for either nails or staples, make sure that detail is included on the approved plans and specifications for a given project, as well as in the roofer’s scope of work. If staples are to be substituted for roofing nails, make sure the acceptable wire gauge and staple length are clearly stated, as well.
4. Adjust nail guns for the job. As the builder, you may not own and use nail guns on the jobsite, but it’s your responsibility to make sure they are adjusted to the proper settings to provide adequate, consistent fastener penetration. Too little pressure leaves the crown of the nail or staple too high, creating a bulge in the profile of the shingle. Too much pressure and the nail or staple can crush the shingle or even be driven through it.
If a nail gun or automatic stapler is to be used, make sure the air pressure is correct. Also, because air pressure can change over the course of a day, the compressor should be checked periodically to ensure air pressure remains within an acceptable range. Ask your trade contractor to document all air pressure checks and adjustments during the course of the day.
5. Conduct a personal inspection of the completed work. An inspection from both the roof level and ground will ensure that the quality of workmanship and aesthetic details are what you expect. As part of the inspection, you should:
- Scan for holes in shingles that were created during the installation of cleats or other temporary framing members. Shingles with holes need to be replaced, not simply filled with roofer’s mastic.
- Make sure the paper and the shingles in the roof valley are secured to the roof sheathing, not suspended above it.
- Look for reverse shingling, especially near a chimney or a plumbing stack. Water flows downhill and shingles need to let it flow, not catch it.
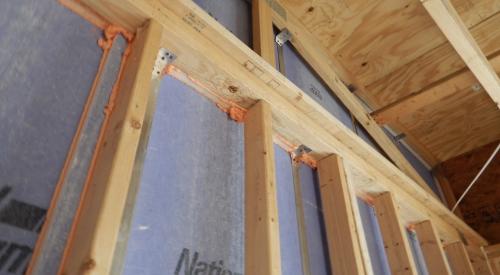
- Look through the trusses or ceiling framing from the underside of the roof to confirm if nails or staples were used in compliance with your specifications. This inspection can also confirm if sufficient quantities of fasteners were used and spacing guidelines were followed.
Document all required corrections and agree with the roofing contractor on when a follow-up inspection can be scheduled. Don’t assume the corrections will be made; always re-inspect. Document all inspections and make sure you and the roofer sign off on the final report.
Specific scopes of work and inspection checklists are two key elements of a documented quality management system adopted and implemented by quality-minded builders across the country. Check out the NAHB Research Center’s Web site for more information on implementing quality management systems for both builders and trade partners.
Created in 1964, the NAHB Research Center is a full-service product commercialization company that strives to make housing more durable, affordable and efficient. The Research Center provides public and private clients with an unrivaled depth of understanding of the housing industry and access to its business leaders.


