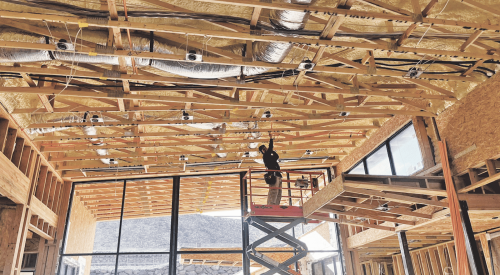
Although most home builders do a good job with blown-in-place attic insulation, I repeatedly see the same handful of shortcomings on jobsites I visit. Fortunately, they’re easy to prevent.
Most often, I find low insulation depths (lower R-value) in hard-to-reach spots, insulation dams that appear likely to fail, and drafty attic hatches. I also see inadequate platforms for attic storage, which increases the likelihood homeowners will disturb the insulation or accidentally put a foot through the ceiling. Consider these tips to rectify such attic insulation trouble spots.
Home Insulation Solutions for Tricky Areas and Trouble Spots
Insulation Challenge 1: Inaccessible areas
Solution: Pre-install batts in hard-to-reach places
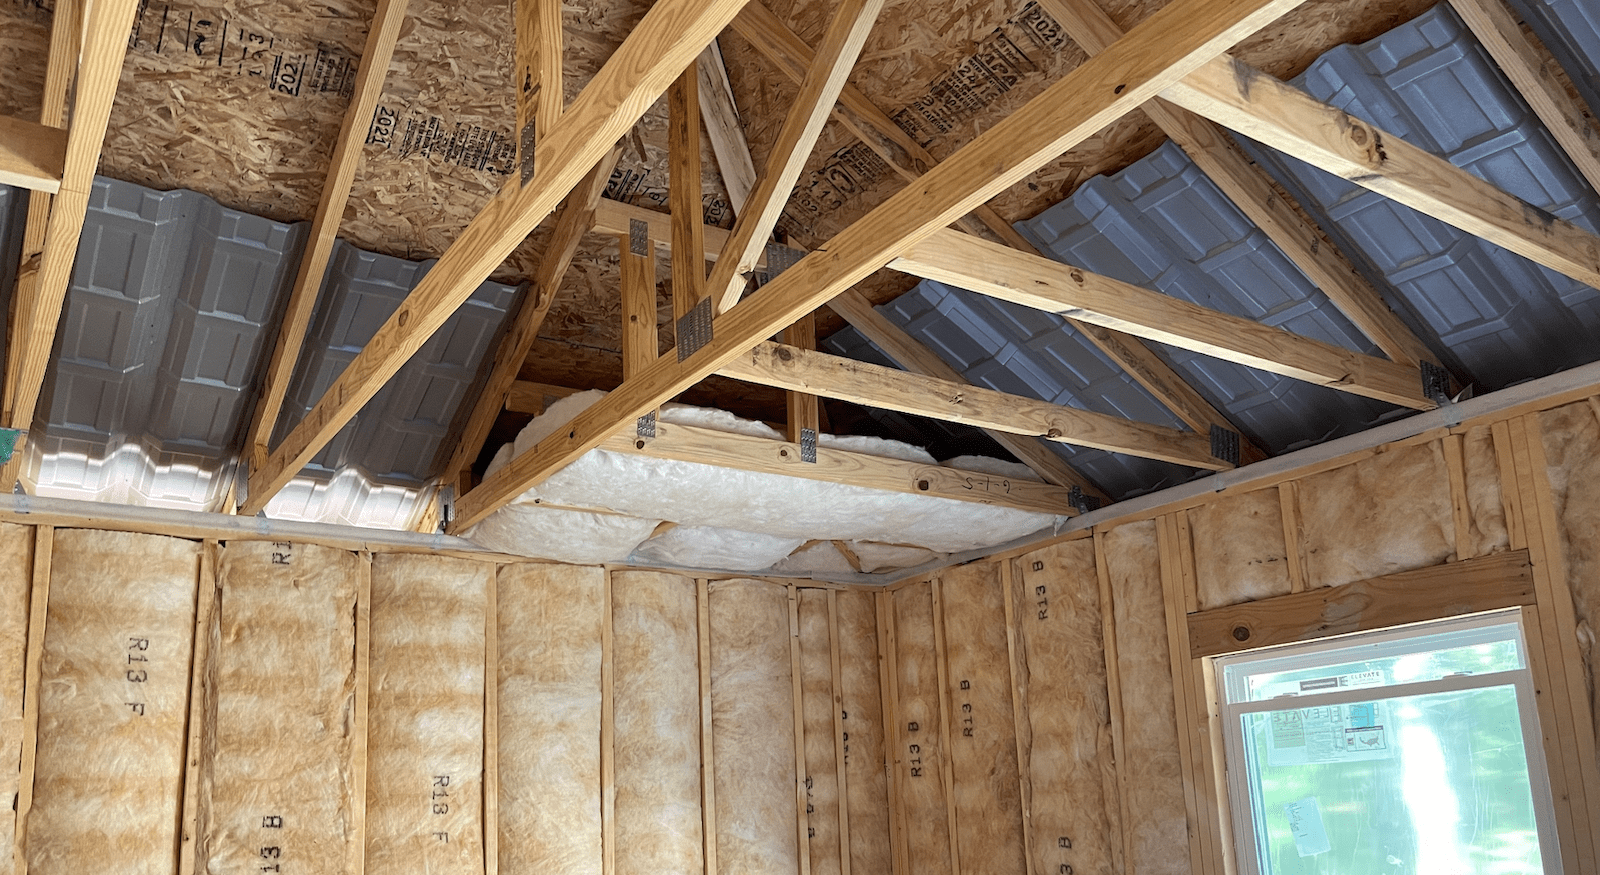
Some attics have cramped, tough-to-reach places, such as hip-roof corners and the spaces under mechanical platforms and around ductwork and some fans. If the insulator can’t get a loose-fill insulation hose into these spots or can’t check the results, such areas will end up poorly insulated or not insulated at all.
The remedy is to insulate them from below with fiberglass batts that are the same R-value as the blown-in depth of the insulation before the ceiling drywall goes up (see photo, above). Most builders use batts in the walls, so it’s a simple matter of identifying the difficult attic areas and adding ceiling batts to the wall insulation crew’s scope of work.
RELATED
- Energy-Efficiency Road Map: Whole-Building Envelope Sealing
- 5 Insulation Products for a More Energy-Efficient Home
- Batts Done Right—Insulation Best Practice
- Wall Framing Techniques to Improve Thermal Performance and Lower Costs
Insulation Challenge 2: Keeping insulation in place
Solution: Use proper insulation dams
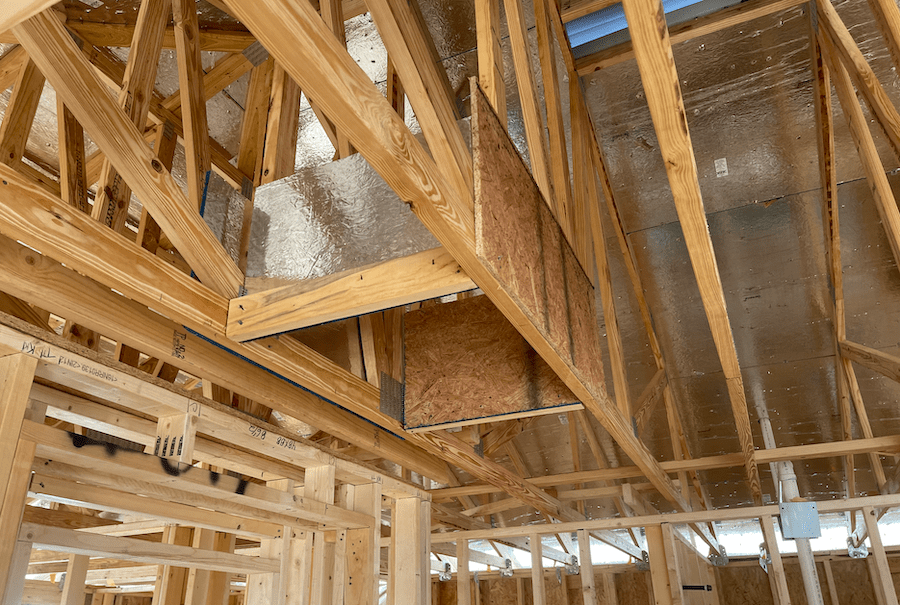
You want blown attic insulation to stay where it’s supposed to and to be installed to the correct depth across the entire attic floor. That’s why you need insulation dams around access hatches and other ceiling-height changes, as well as where the attic meets an unconditioned space such as a garage or porch ceiling.
Those dams need to be rigid and durable. Cardboard dams (which I often see) are neither, and plastic or foam-board dams are easily damaged by activity in the attic. By contrast, a dam made from plywood, framing lumber, or OSB (oriented strand board) (see photo, below) will stand up to abuse and will last the life of the house, keeping the insulation depth consistent and the insulation in the correct location.
Insulation Challenge 3: Access hatches
Solution: Insulate and seal hatches and covers
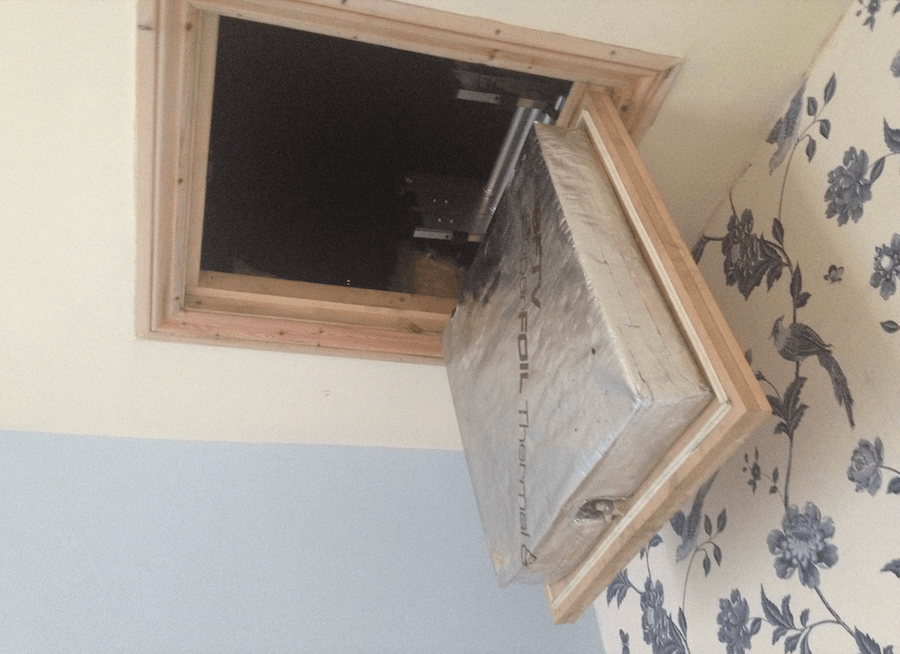
Uninsulated attic access hatches work against your energy-saving and indoor comfort efforts. That’s why codes now require that access hatches be insulated to the same R-value as the rest of the attic.
Best practice is to permanently attach insulation—a batt or a piece of rigid foam—to the top of the hatch (see photo, below). To eliminate drafts, install tightly sealed weatherstripping on all four sides of the trim around the hatch.
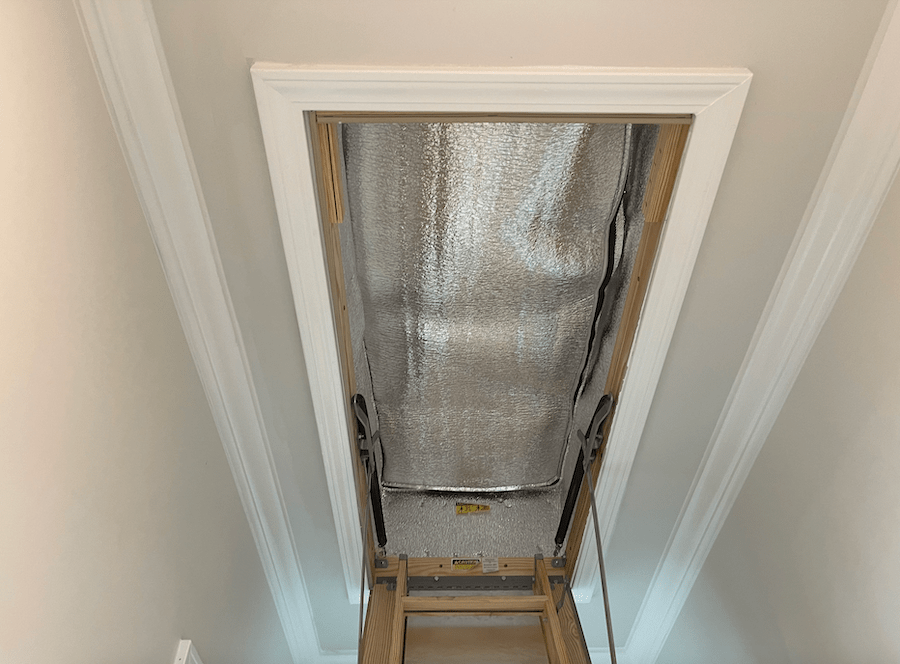
For a pull-down stair leading to the attic, provide an insulated cover that fits over the opening. A good commercially available cover consists of a rigid box with a reflective surface and a rubber gasket that makes a seal with the attic floor. Or purchase an attic-ladder insulation cover that includes a zipper to seal the attic from the house (see photo, below).
Insulation Challenge 4: Disturbance and damage
Solution: Prevent or discourage homeowners from storing items in the attic
Doing so will mitigate damage to mechanical runs, limit disturbance to the insulation, and prevent potential damage to framing or drywall if homeowners fall or put a foot through the ceiling below.
If you must offer attic storage in your homes, design the framing to carry loads and provide a pull-down stair leading to a beefy storage platform made from plywood or OSB. Even in those cases, you can help discourage homeowners from disturbing the insulation beyond the borders of the storage platform (or taking an ill-advised step onto the ceiling drywall) by installing a safety railing that blocks off the storage platform from the rest of the attic.
