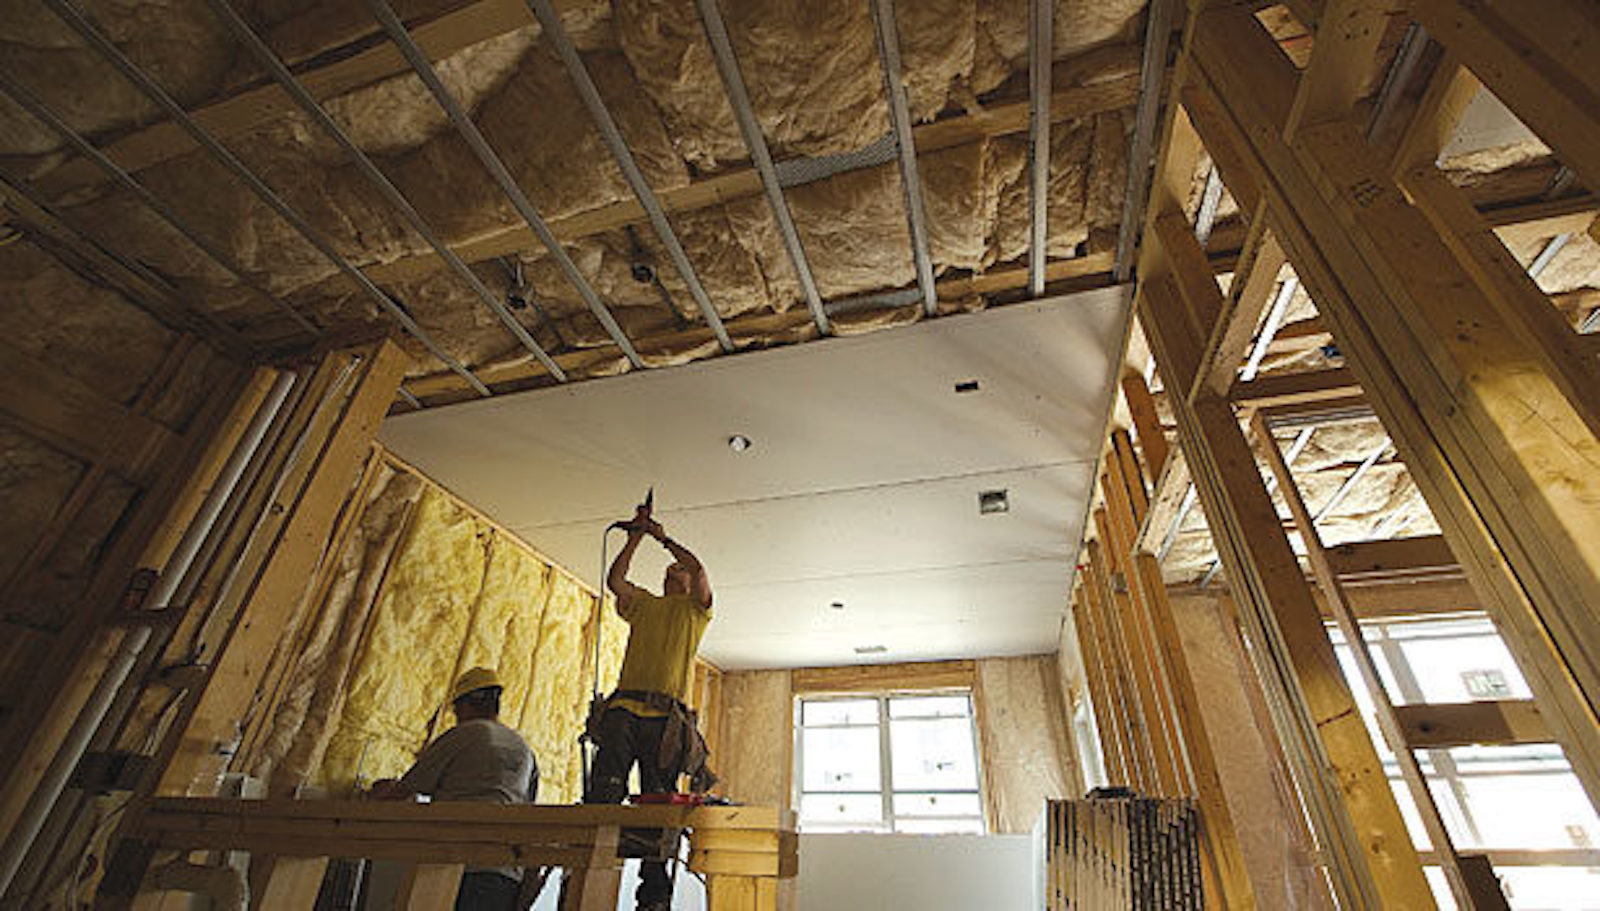
From the moment you frame a house to the day it’s torn down it will be in perpetual movement. Wind, seismic and live loads, and changes in temperature and humidity all contribute, causing cracks, bows, nail pops, and squeaks. Homes must be built to allow for all of this movement, and gypsum wallboard (drywall) is on the front lines of that battle.
How to Avoid Drywall Cracks
To successfully fight back against cracks in drywall, though, we need to first talk about four factors related to framing issues:
- Knowing your wood
- Managing truss uplift
- Floating drywall panels over beams and girders
- Decoupling ceiling drywall from framing
1) Know Your Wood
Simply, kiln-dried lumber can absorb moisture from the air: As the moisture content of wood increases, the wood expands; as it loses moisture, it shrinks.
When I was a frame carpenter, the expression, “When in doubt, add a stud,” was common practice. But I’ve since learned to minimize framing to what is structurally necessary: The less lumber, the less potential for movement ... and problems.
Before installing gypsum panels, the framing should have a moisture content at or below 19%. At load points (where a window header rests on trimmer studs, for example), make sure the contact point is tight or is shimmed tight to reduce potential settling of the header.
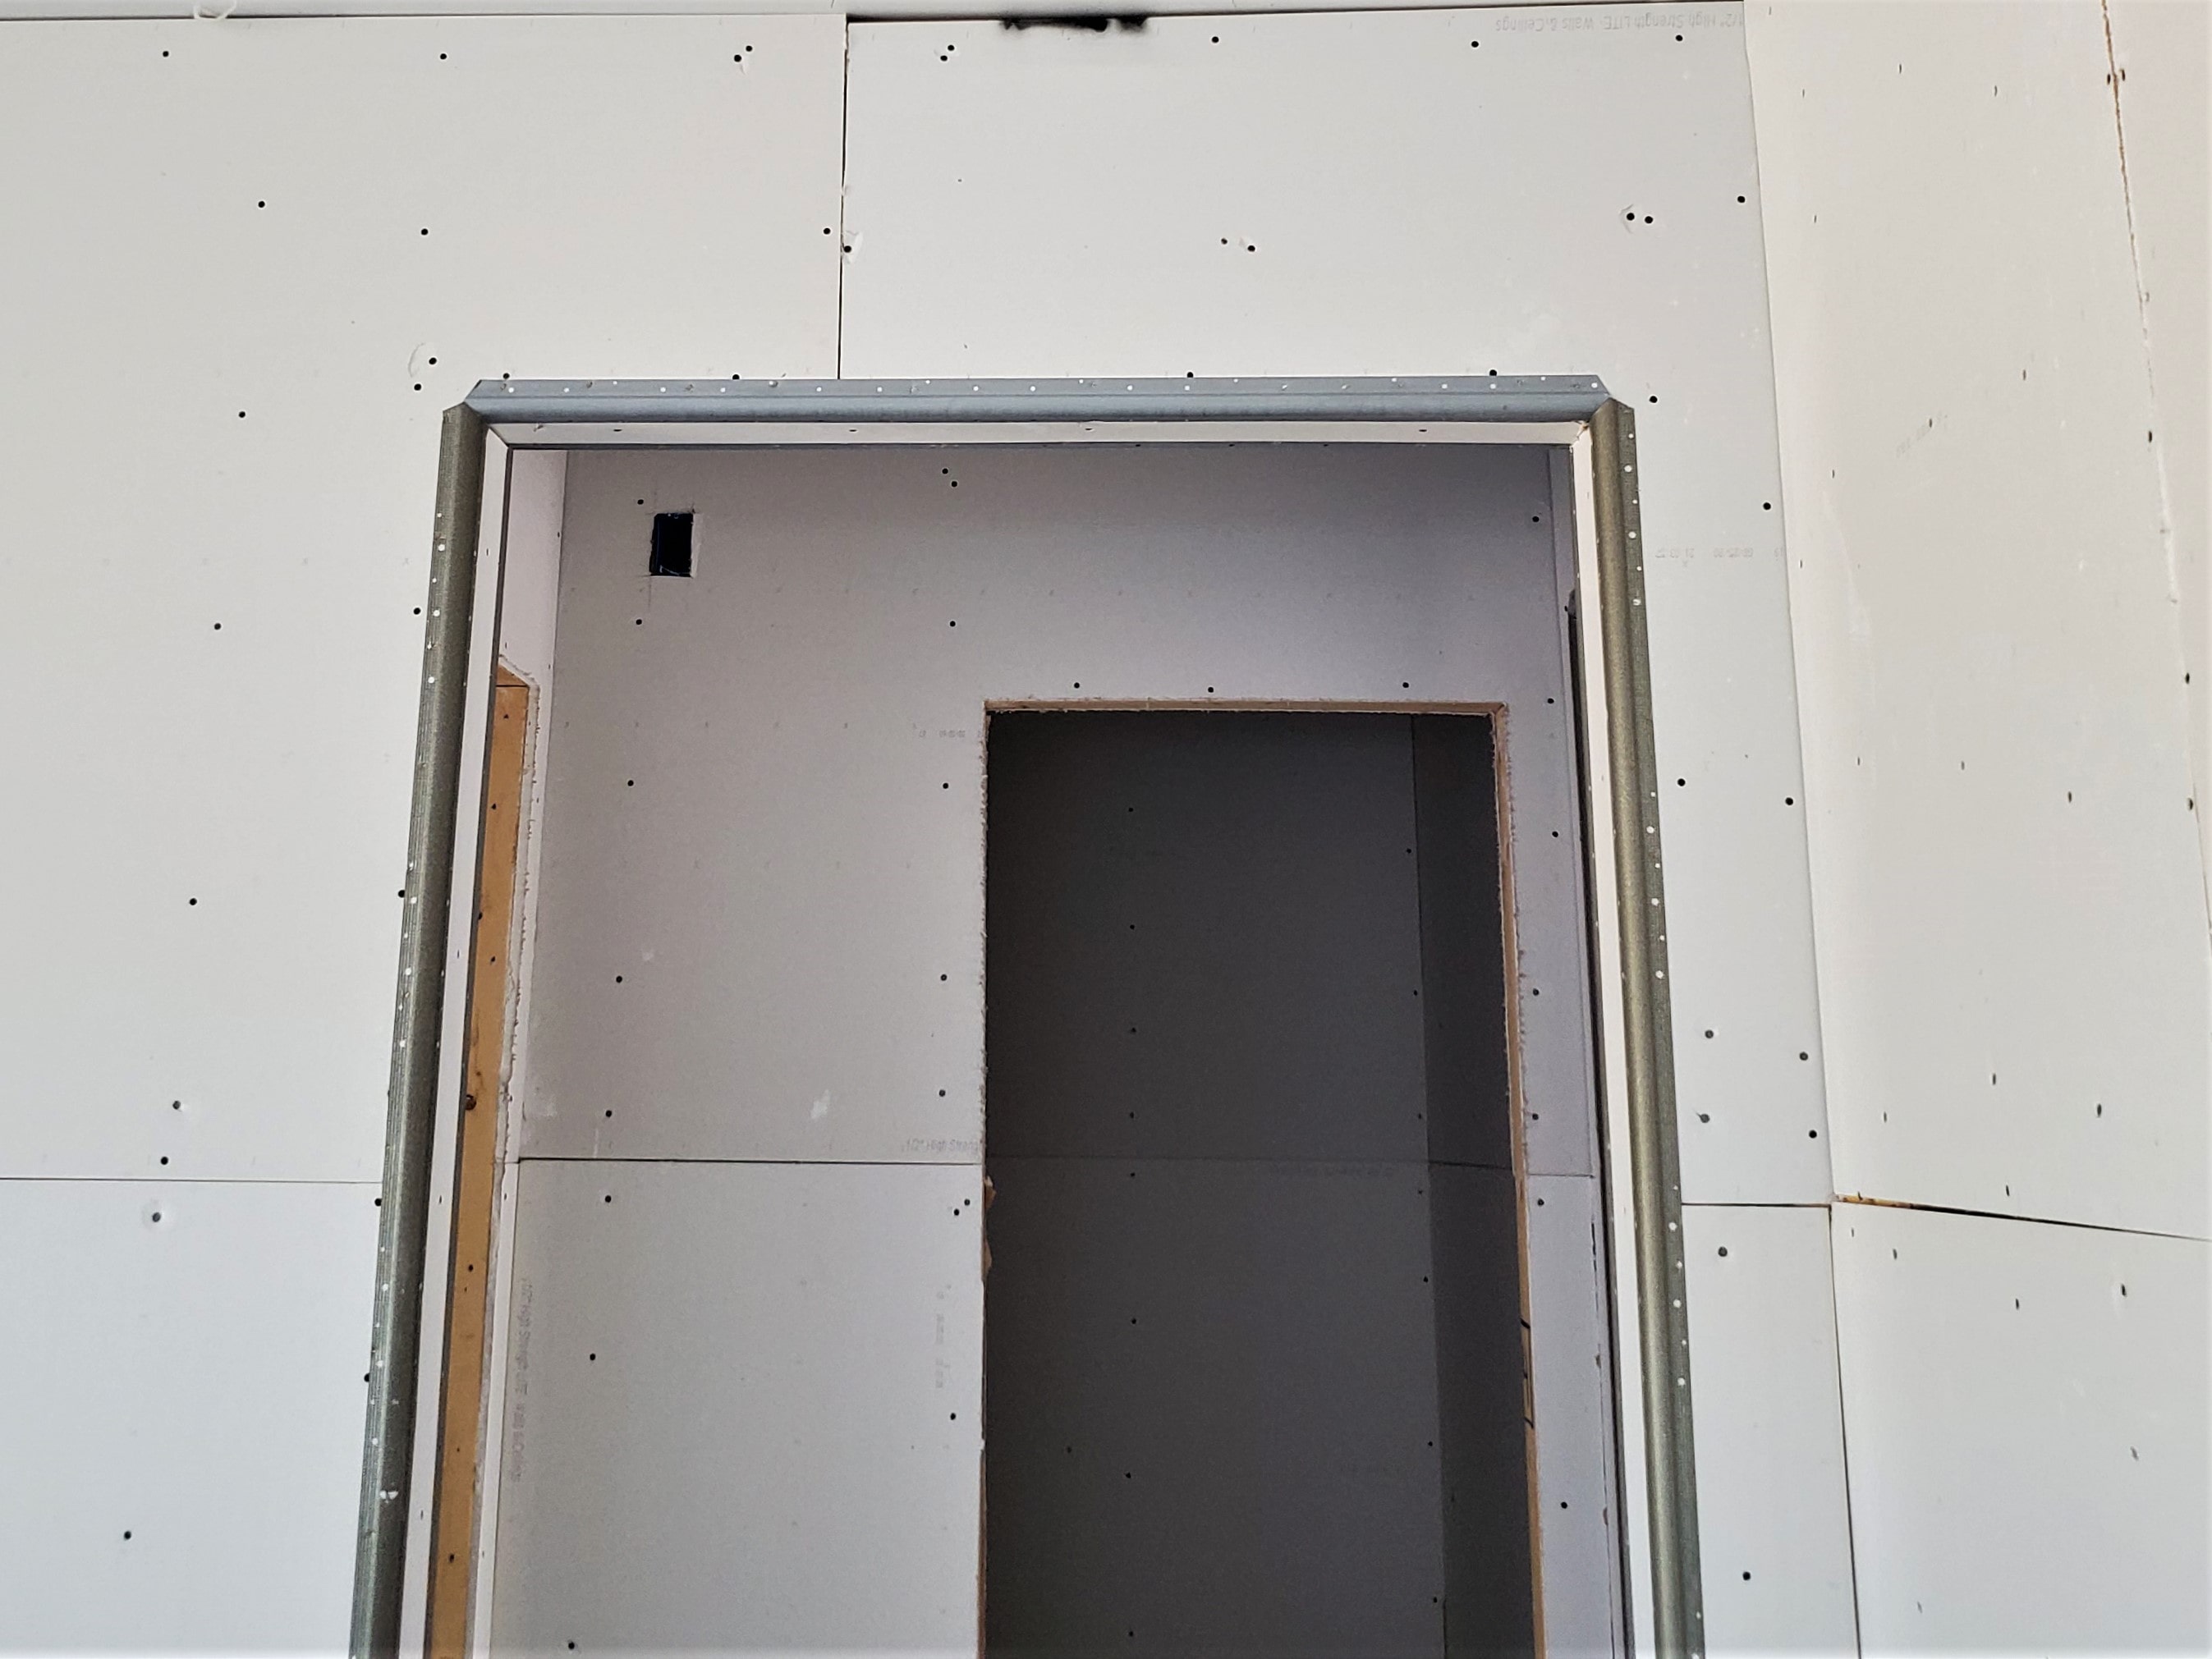
Another critical area of movement occurs at the inside corners of openings. Doors, windows, and corners in tray ceilings are weak points where vibration from use, wind, or settling can transfer stress to the drywall panels secured to them. Keep all drywall seams and joints at least 6 inches away from these corners to reduce the impact of this movement.
RELATED
- How to Avoid Drywall Problems From Truss Uplift
- More Tips for Conquering Drywall Cracks
- Video: Solving Truss Uplift
2) Manage Truss Uplift
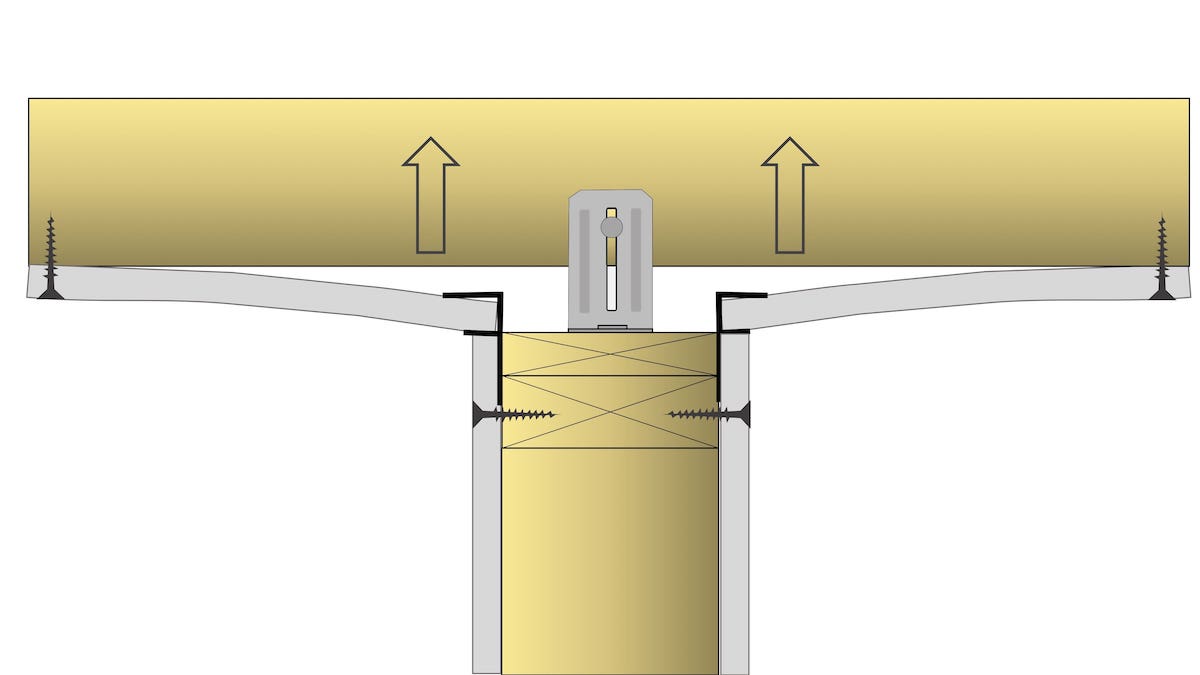
Engineered roof trusses often experience what is known as “truss uplift,” a condition where the bottom chords of the trusses lift at the center when the top and bottom chords of the truss are exposed to different temperatures and other conditions. In the winter, top chords will often absorb more moisture from the air than bottom chords, causing the top chords to elongate while the bottom chords remain stable. As a result, the bottom chords are lifted up by the expansive movement of the top chords (see diagrams below).
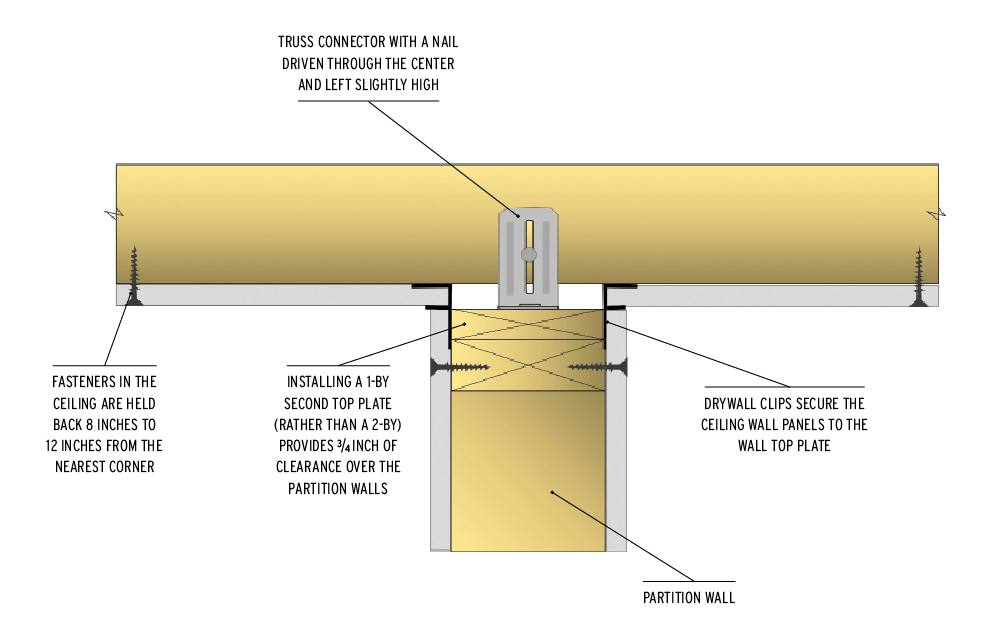
When installing drywall panels on the ceiling, it helps to hold the fasteners away from the interior partition walls. Eight inches is good, 12 inches is better. Also, use drywall clips to secure the ceiling drywall to the tops of partition walls. Both practices allow the drywall to flex with the movement rather than experiencing tears in the drywall tape or nail pops near the walls.
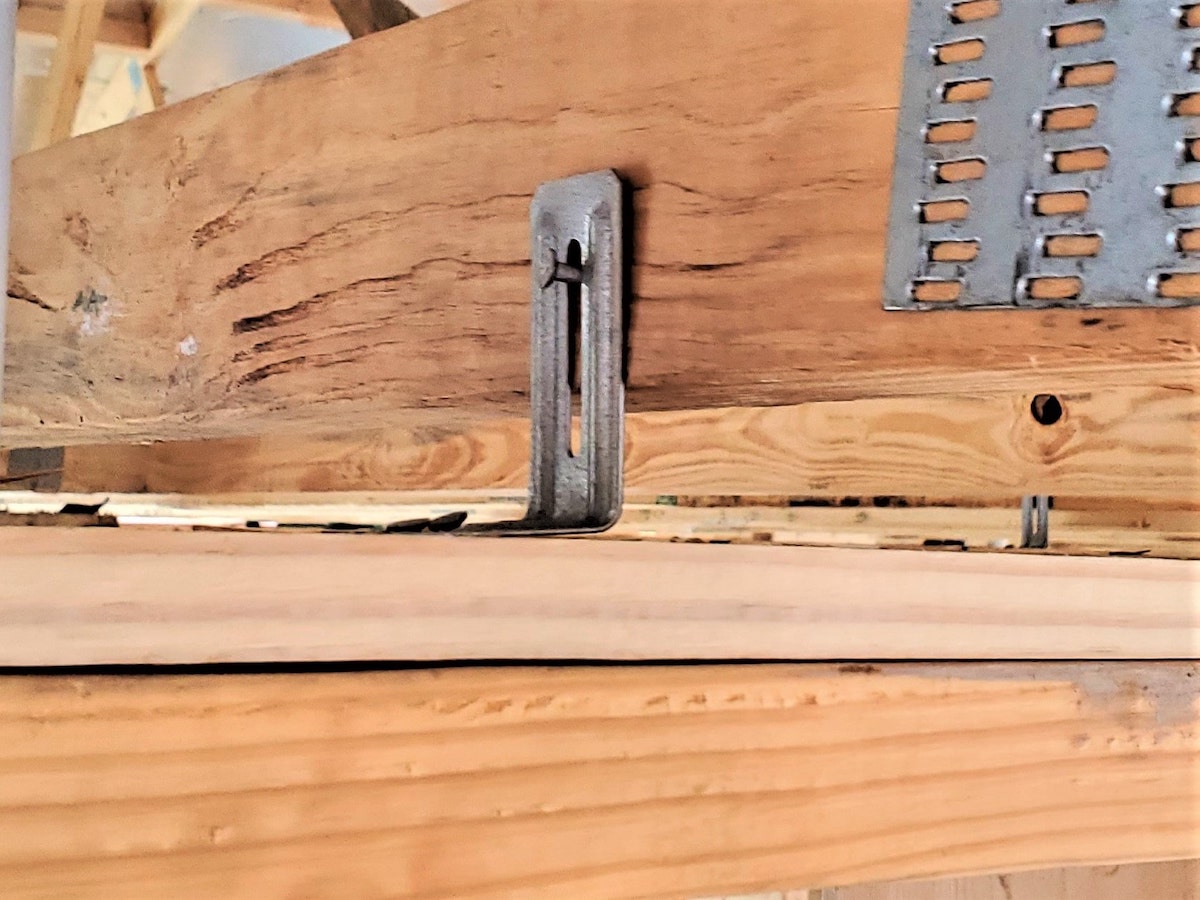
If partition walls need to be stabilized with a connector to the bottom chords of the trusses, use a floating clip with an elongated slot (STC, DTC, or HTC) in the vertical leg. Place nails through the center of the slots and leave the nails slightly high (loose) to allow the truss to move. Because trusses are prone to this vertical movement, it also is a best practice to provide at least 3/4 inch of clearance between the bottom chord and partition walls. We recommend using a 1-by as the second top plate on the partition walls.
3) Float Drywall Panels Over Beams and Girders
Another issue at the ceiling plane occurs when there is a beam or girder truss. After installing shims to level the ceiling plane, make sure to “float” the gypsum panels over these components so panels don’t have any seams that align with the beams or girders.
4) Decouple Ceiling Drywall From Framing
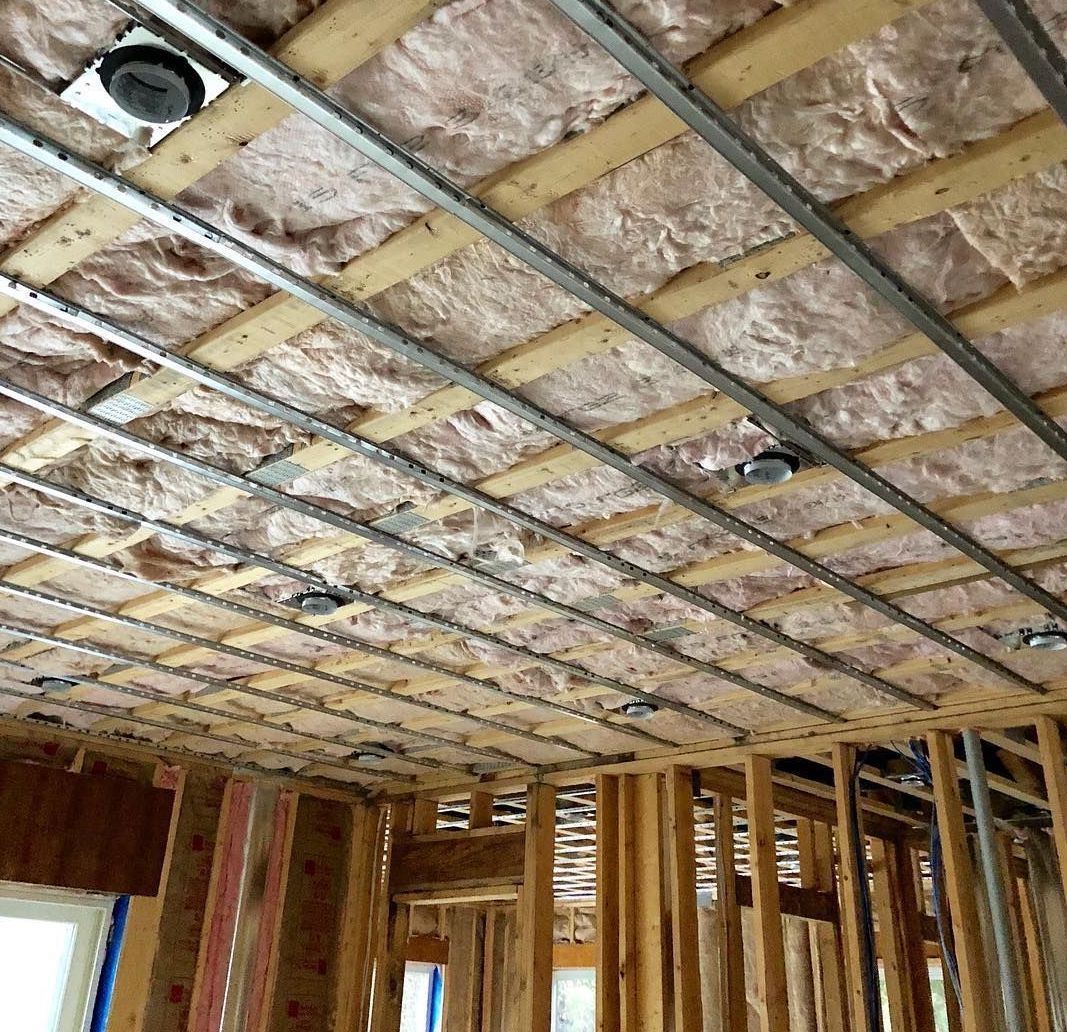
Finally, long spans along the ceiling plane should be interrupted with partitions, soffits, or even control joints, especially if spans are parallel to the trusses. If that’s not an option, consider installing RC (resilient channel) or “hat” channel (see photo, above), to decouple framing from the ceiling drywall and greatly reduce the impact of framing movement.
Graham Davis drives quality and performance in home building as a senior building performance specialist on the PERFORM Builder Solutions team at IBACOS.
