Even builders that do a good job of preventing water intrusion by flashing windows and doors can fall short when it comes to vents and pipes protruding through the building envelope, presumably because problems caused by leaks around those penetrations take a long time to announce their presence. But while they may not generate year-one warranty calls, such leaks are a long-term liability for mold and rot problems.
To be sure, I’ve seen some cringeworthy penetration “flashing” jobs, especially on round vents and pipes, despite the fact that it’s relatively easy to do them correctly. A little extra care is all it takes to ensure long-term performance.
Below are some of the worst offenses (the Ugly), and the Good, Better, and Best options for doing penetration flashing right.
Penetration Flashing: The Ugly
The worst installations ignore the most basic water-management principle: integrating penetrations with the drainage plane using flashing materials made for that purpose.
In Texas, for instance, it’s not unusual for builders to install the siding before the mechanical trades show up. That leaves no choice but to “seal” pipes and vents with caulks, sealants, or expanding spray foams where they penetrate the cladding, which begins deteriorating in just a few years.
It should go without saying that you need to use actual flashing tape, but some people seem to have missed that message. I’ve seen instances where someone bunched housewrap around a penetration or used housewrap tape rather than flashing tape. Neither is acceptable for penetrations.
Another basic but often overlooked rule is to cut a 2-inch hole for a 2-inch pipe. Simply, a bigger hole will be harder to flash correctly and incidental movement of the pipe could loosen the flashing application over time.
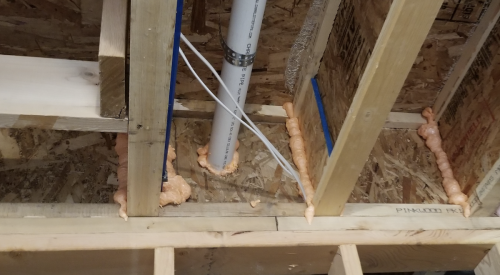
It’s also critical that all flashing tape is rolled out against a solid backing; you can’t achieve proper adhesion unless there’s something behind it. Builders that use open-frame construction (popular in Arizona) need to block between the studs at every wall penetration. Those that don’t usually just seal those holes using spray foam, which quickly degrades.

Good, Better, Best Options for Penetration Flashing
Assuming you don’t build the way I just described, consider these options for penetration flashing.
Good: The minimum standard is non-flexible butyl tape, carefully overlapped shingle-style to properly shed water. Avoid rubberized asphalt, which can lose adhesion over time and doesn’t stick well when stretched around a pipe.
Better: Flexible flashing tapes with a butyl or acrylic adhesive are made to encircle curved surfaces. They may cost more than standard tape, but they deliver a better seal. They also require less skill to install. Flashing a pipe penetration with a flexible tape is simply a matter of stretching a base layer around the bottom of the pipe, then stretching a counterflashing layer around the top and lapping it over the bottom layer. It is crucial that pressure is applied with a roller or similar flashing tool to ensure complete, long-term adhesion.

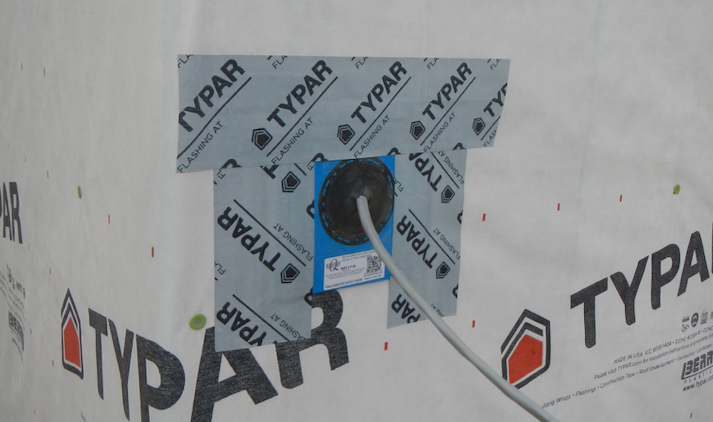
Best: A manufactured flashing panel with a rubberized gasket is the ideal solution and is easily integrated into the drainage plane, which is the reason more builders are adding them to their construction specifications (see main photo for this article, above).
Whatever method you choose, quality assurance can be a challenge. A builder I know considers flashing so important that it hired someone to exclusively perform that task, simplifying on-site quality management.
John F. Koenig drives quality and performance in home building as a building performance specialist on the PERFORM Builder Solutions team at IBACOS.
Learn more about flashing: Watch a video here about how to effectively flash wall penetrations from Professional Builder's sister site, ProTradeCraft.com.
Access a PDF of this article in Professional Builder's July 2019 digital edition


