Faced with meeting increasingly stringent energy codes and a growing demand for green, high-performance features, builders nationwide are looking to maximize the energy efficiency of their homes without blowing the budget. The easiest and most economical step to creating energy-efficient homes is to master building envelope and air sealing design.
Based on fieldwork with builders across the country conducted by the NAHB Research Center under the DOE’s Building America program, we have found certain practices to be highly beneficial in creating tight and efficient building envelopes. The following practices can lead to better-performing wall systems with improved energy efficiency, moisture resistance, durability, and ease of installation, as well as lower construction costs.
For more information on the advanced techniques discussed in this article, visit the NAHB Research Center’s ToolBase Web site: toolbase.org. To find out about becoming involved in the Research Center’s Building America team field evaluations, contact us online at nahbrc.com/BAContact.
Created in 1964, the NAHB Research Center is a full-service product commercialization company that strives to make housing more durable, affordable and efficient. The Research Center provides public and private clients with an unrivaled depth of understanding of the housing industry and access to its business leaders.
1. Optimize frame design and add rigid exterior insulation
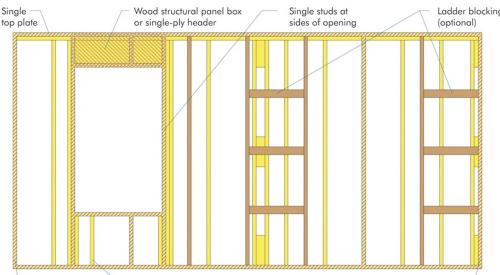
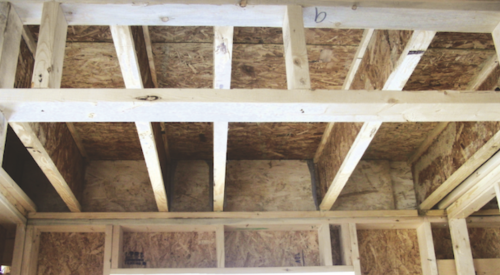
By optimizing framing design, builders can greatly reduce energy losses from thermal bridging through the exterior walls. To accomplish this:
- Employ specific framing layouts to eliminate unnecessary framing members
- Make sure the headers are sized correctly
- Locate openings to match framing members
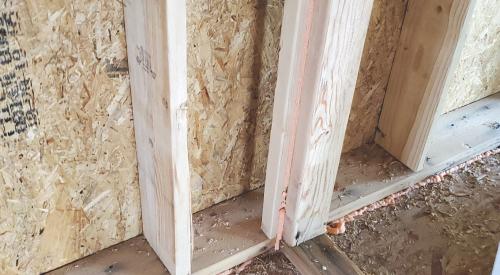
- Use optimum value engineered (OVE) techniques, such as turned-stud corners, stand-off wall intersections, and optimized window locations to reduce thermal bridging in corners and wall intersections
- Panelize wall sections to minimize confusion in the field
2. Increase the dimension of the wall framing, typically from 2x4 framing to 2x6 framing
The thicker the studs, the more energy-efficient the wall system, provided that the wall cavity is properly insulated. While increasing the dimension of the wall framing will require design changes, it adds little or no cost to traditional, 2x4 framing methods. Features of the design could include inline framing at 24 inches on center; location of first-floor headers to the rim area; and incorporation of optimized framing techniques to limit framing member count.
3. Install both interior and exterior air barriers
While both types of air barriers serve similar purposes, each complements and enhances the effectiveness of the other. Interior air barriers control leakage of a home’s interior air into the wall cavity and attic, limit the ability of moist indoor air to enter the wall cavity during the heating season and limit convection losses within walls. Exterior air barriers control infiltration of exterior air into the wall cavity and through the attic, limit the ability of moist outdoor air to enter the wall cavity during the cooling season and prevent wind-washing of wall insulation.
For the exterior air barrier, consider using housewrap or an insulated sheathing system. When applying housewrap, make sure to tape all vertical and horizontal seams and penetrations, seal top and bottom edges of the housewrap to the structure, and install the wrap using appropriate “shingling” methods to maintain the water barrier characteristics.
For the interior air barrier, use an airtight drywall construction approach. This process involves sealing the top plates of interior walls and all ceiling penetrations at the attic level, as well as the top and bottom plates and around rough openings of exterior walls. In addition, consider using continuous gaskets or drywall adhesives that are also sealants.
4. Isolate the attic from exterior walls and conditioned spaces
This can be accomplished by:
- Sealing interior drywall and exterior sheathing at top plates using gaskets or sealant
- Installing gasket or sealant for all recessed light fixtures at the attic level
- Installing gaskets for attic access panels and stairs
- Using spray foam over top plates from the attic
5. Consider sill plate gaskets designed to provide both a capillary break and an air seal
6. Ensure a tight seal throughout the structure
 Critical areas include:
- Rim joist areas
- Exterior wall bottom plates (seal plates to the deck using caulk or gaskets)
- Window and door rough openings
- Garage-side drywall at conditioned spaces (seal top and bottom plates and around doors and electrical boxes)
- Framed cavity air barriers (e.g., fireplaces, attic knee walls, dropped ceilings and soffits, behind tubs, cantilevered floors, and garage draft stops)
- HVAC ductwork sealed and installed in conditioned spaces
- Electrical boxes (seal around and behind boxes)
7. Minimize size of opening for mechanicals through framing and air barriers
8. Consider a 1-inch gap between the interior framing and exterior wall
This will allow for continuous drywall on exterior walls using an approved top late structural bracket.
9. Test your design
Perform a blower door test to check for any missed leaks that can be repaired or minimized and to check the actual airtightness of the home. Also, consider conducting long-term monitoring of the home's actual energy use.
10. Think on a whole building level
Develop a whole building design approach that considers all of the air sealing, insulation, structural and energy efficiency systems and details of how the components work together.
11. Complete the Energy Star thermal bypass checklist
This is a good idea whether you're seeking Energy Star certification or not.
Tips for Minimizing Costs for Advanced Framing Techniques
Advanced framing techniques can add anywhere from zero to more than $1,000 to typical construction costs. To help contain or even reduce costs, consider applying these practices:
- Begin planning at the design stage. Lay out the walls and window locations to optimize lumber use and specify on the plans the optimum value engineered (OVE) features that will be utilized. Specify the air sealing and water management approach for the exterior walls. For instance, if you’re planning to use panelized walls, some air sealing can be performed at the plant, which will lower costs and simplify field installation.
- Determine with your framer/panelizer the most efficient, cost-effective structural approach to incorporate exterior insulating sheathing.
- Meet with your trades before construction begins to discuss the importance of having the wall system perform both structurally and thermally. Establish trade scopes of work that identify all aspects of the thermal enclosure that must be reviewed jointly by the builder and trade contractor at strategic points throughout the construction process.
Authors: Joe Wiehagen, senior energy engineer; Amber Wood, energy programs manager; and David Mallay, research engineer, NAHB Research Center
NAHB Research Center: Created in 1964, the NAHB Research Center is a full-service product commercialization company that strives to make housing more durable, affordable and efficient. The Research Center provides public and private clients with an unrivaled depth of understanding of the housing industry and access to its business leaders.
