Designing a new elevation series is a lot of fun. It is an opportunity to define your brand and create homes that will speak to buyers emotionally. Here are three things to look out for when your elevations are in the sketch phase:
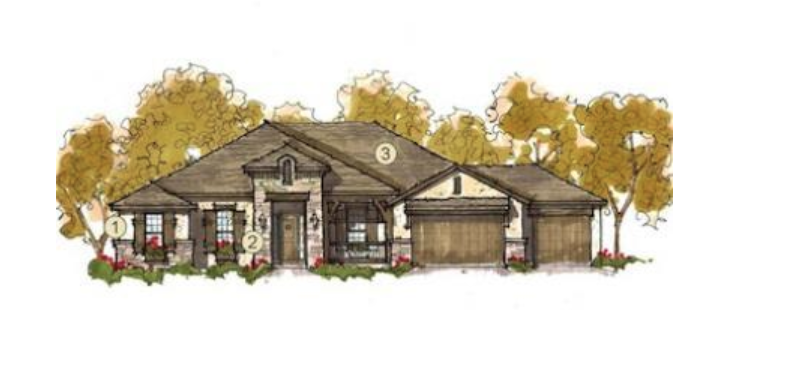
1. Massing and fenestration: Make sure that your windows and doors relate well to the area of the home they are tied to. Too many times I have seen small windows lost in a large wall, or the opposite effect, windows that are far too large relative to the wall space they occupy. How many times have you seen shutters almost hanging off the edge of a wall?
2. Shutters: Visually imagine your shutters closing in to protect the window. Do the shutters fit the opening? Many that I have seen do not. A very common mistake is to put 12-inch shutters on a 36-inch-wide window. They look too small to cover the window and immediately lose any semblance of authenticity.
3. Roof pitch: The roof pitch must fit the style of home. When designing a home that reflects a period or style one of the most important elements is the roof pitch. This (above) is an example of a Tuscan elevation. The homes in Tuscany are characterized by low pitch hip or gable roofs that create a look that is low, expansive and horizontal in nature. To put a steep pitch on this home wouldn't be appropriate to the style.
Curb appeal is critical to sales. When designing elevations verify that the detailing is correct and the massing is appropriate. Lastly, please make sure the shutters are the right size! It is quick and easy to check and it goes a long way to making your elevations authentic and aesthetically appealing.


